America's Test Kitchen: Thick and Chewy Chocolate Chip Cookies for Valentine's Day

[Scroll down to view recipe and video]

America's Test Kitchen Thick and Chewy Chocolate Chip Cookie
Chocolate Chip Cookie Made from Scratch
When people think of cookies, they think of chocolate chip cookies, the king of cookies. They don't think of peanut butter cookies, they don't think of oatmeal cookies, and they certainly don't think of gingerbread cookies. It's all about the chocolate chip cookie and rightfully so. Even the good old chocolate chip cookie has many variations. Small cookies, large cookies, thin and crispy cookies, those with nuts, those without nuts, dark chocolate chips, etc., but my personal favorite is the thick and chewy chocolate chip cookie. People automatically think of Mrs. Fields cookies when it comes to chocolate chip cookies. Double Tree Hotel also makes a good chocolate chip cookie as well, but classic recipes for chocolate chip cookies include the classic Nestle Tollhouse (the original chocolate chip cookie), Alton Brown's The Chewy Recipe, the New York Times recipe for chocolate chip cookies, and the Neiman Marcus recipe for chocolate chip cookies.

I know everyone has their favorite chocolate chip cookie recipe, and I'm not going to say that one is better than the other. In fact, there are just so many good recipes for chocolate chip cookies that it's nearly impossible to determine which one is the best. I personally like the thick and chewy chocolate chip cookie recipe from America's Test Kitchen (season 1, episode 10: Cookie Jar Classics) which is surprisingly similar to Jaay Dunlap's Best Ever Chocolate Chip Cookie recipe which appeared on JustBaking.net in November of 2006. With Valentine's Day about a week away, you can bake a batch of these thick and chewy chocolate chip cookies for your significant other. I know that's what I'd do for her. You can put them in a nice tin, tie a red ribbon or bow around it, and give it to her after your date night. I doubt shaping them into heart shaped cookies will work, so just shape them the way you normally would. You can definitely bake these cookies for other occasions as well like for your mom on Mother's Day or even for Santa for Christmas.

Enjoy your freshly baked chocolate chip cookie with a glass of milk
Enjoy your freshly baked chocolate chip cookie with a glass of milk.
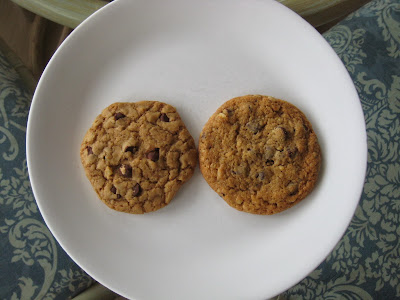
Baking chocolate chip cookies for your special someone is perfect for Valentine's Day because everyone loves chocolate chip cookies. Who doesn't like a good chocolate chip cookie? If you're baking these cookies for your wife or girlfriend, then she'll appreciate your putting the time and effort into making a batch of homemade cookies just for her. She'll definitely feel special for the amount of work put into it. If you intend to make cookies for your husband or boyfriend, then that's great since the best way to a man's heart is through his stomach. Chocolate has always been synonymous with romance. It's a win/win situation for everybody and this small gesture can go a long way to show how much you care. Just don't get the frozen pre-made dough even the Tollhouse one isn't very good (see picture below). Not only did it spread out, thin, and over bake under identical conditions, it had an artificial taste that did not taste too good. You can't really tell from the picture below, but the Tollhouse cookie was very flat leading to a thinner cookie (as if no leavening agent was added) than the America's Test Kitchen Thick and Chewy cookie (which remained nice and puffy) even though both had the same amount of dough, shaped the same way, and baked in the oven at the same temperature for the same amount of time.

ATK Thick and Chewy Chocolate Chip Cookie versus Nestle Tollhouse frozen dough
ATK Thick and Chewy (L) and Tollhouse frozen dough (R) baked under the same conditions.

Now I've been baking for awhile now and I've made banana nut bread, apple turnovers, blueberry muffins, blueberry scones, focaccia bread, lemon bars, and chocolate cake, but I've never made cookies. Making the cookie dough is probably the easiest dough you'll ever have to make - you just mix everything together using a stand mixer. Sometimes I like to use 1 cup of bread flour and 1 cup of AP flour because the extra protein found in bread flour helps to develop more gluten which would make for an even chewier cookie. Experiment between using different ratios of all purpose and bread flour and see the differences and determine which works best for you.

use a stand or hand mixer to mix your cookie dough
Use a stand or hand mixer to mix your cookie dough.

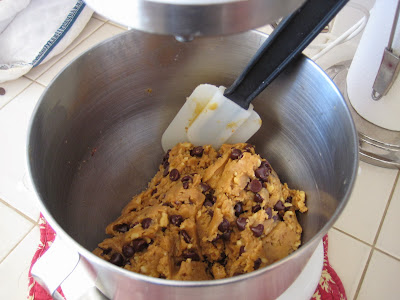
chocolate chip cookie dough should be thick
Your cookie dough should be very thick in texture.

When you add the chocolate chips, don't mix it too much using the mixer. The mixer paddle will break up some of the chips, so just use the mixer for only a few seconds when incorporating the chocolate chips and mix the rest by hand. I also like adding a cup to a 2 cups of chopped walnuts to the cookie dough. The nuts tempers the sweetness from the sugar and chocolate chips.

I use a #16 (2.75 oz) scoop from Sur La Table (they have various sizes of scoops) and I level it off meaning that I only use enough cookie dough per cookie that would fit inside the actual ice cream scoop - nothing more. What you have is a half sphere of dough. I then shape it into a sphere. Most people at this point would place the ball of dough on the cookie sheet, but I don't. I squish the dough ball so that I have a disk of dough about a half inch thick (this method usually produces 2 dozen cookies that are about 3 inches in diameter from this recipe). What you get is a better shaped cookie that is consistently thick and even throughout the cookie. I find that cookies that come from a dough ball tend to be very "mound like" - very thick in the center and quite thin at the edges which causes uneven cooking in the oven.

Use an ice cream scoop for uniform size cookies.

ATK Thick and Chewy Dough Ball
Most people form dough balls to make cookies.

ATK Thick and Chewy Dough Disk
But I prefer forming dough disks instead of balls when making chocolate chip cookies.

Sometimes, I'll make the dough a day before baking and leave it in the refrigerator overnight (or sometimes anywhere from 24-36 hours) because a chilled dough will prevent a cookie from thinning out too much. That and it allows the flavors of the dough to come together and develop a more complex flavor profile if you let the dough rest as per the New York Times article. I also like using a pizza pan to bake the cookies because pizza pans tend to be very thin and heat up quickly. If you're using a thick baking sheet, it will take forever for the bottom and inside of the cookie to bake such that the top will be overdone before the center and bottom gets done.

Chocolate Chip Cookies fresh out of the oven and being cooled
Chocolate Chip Cookies hot out of the oven and being cooled.

Now I know it's very tempting to eat a cookie right out of the oven, but I implore you to avoid doing so. You have to let it cool. The reasons are twofold: first, the cookie will break apart. You have to allow the cookie to set which it will do in time. But even more importantly, you have to let it cool down to really enjoy your cookie. This sounds rather counter intuitive since it tastes the best when warm and fresh out of the oven right? Yes they do, BUT.......all chocolate chip cookies do - even the awful ones. When you eat a cookie right out of the oven, it's almost as if your taste buds are biased. The true test of the flavor of a chocolate chip cookie comes when it is cool. A really good cookie will still taste good when not warm. And a REALLY good chocolate chip cookie will still taste good a day after it's baked.

FlavorFool's Notes

  • Use Guittard or Ghirardelli (Guittard is better though) semisweet chocolate chips. Please don't use M&M's...I cringe every time I see a chocolate chip cookie with M&M's instead of chocolate chips.
  • Use a #2 scoop to portion out your dough and shape them into disks instead of spheres.
  • A cup to 2 cups of chopped walnuts is optional and is added along with the flour.
  • I use 1 tablespoon of vanilla instead of 2 teaspoons.
  • I use dark brown sugar instead of light. Dark brown sugar gives a greater depth of flavor than light brown sugar and supposedly it makes for a chewier cookie.
  • Use a thin cookie sheet. Don't use anything too thick since it'll take longer to heat up and for your cookies to properly bake.
  • Enjoy these cookies with a tall glass of milk or perhaps coffee with dessert.
  • Chocolate Chip cookie is best eaten fresh out of the oven
    Cook up some romance on Valentine's Day with these chocolate chip cookies...Enjoy!

    Thick and Chewy Chocolate Chip Cookies Recipe

    America's Test Kitchen - season 1, episode 10, Cookie Jar Favorites
    Makes a dozen and a half (18) large cookies

    Ingredients

    2 cups plus 2 tbsp (10 2/3 oz) unbleached all purpose flour [I sometimes use 1 cup bread flour and 1 cup AP flour]
    1/2 tsp salt
    1/2 tsp baking soda
    12 tbsp (1.5 sticks) unsalted butter, melted and cooled [melted butter makes your cookie moist and prevents it from drying out]
    2 tsp vanilla extract [I increase the vanilla to 1 tbsp]
    1/2 cup (3.5 oz) granulated sugar
    1 cup packed (7 oz) light or dark brown sugar [I use dark]
    1 large egg plus 1 egg yolk
    1.5 cups (9 oz) semisweet chocolate chips [I use Guittard or Ghirardelli semisweet chocolate chips]
    [optional: 1-2 cups chopped walnuts]

    Instructions

    1. Adjust the oven racks to the lower-middle and upper-middle positions and preheat the oven to 325°F. Line 2 large baking sheets with parchment paper.

    2. Whisk the baking soda, salt, and flour in a bowl and set aside. [I sift these ingredients]

    3. In a standing mixer fitted with the paddle attachment, beat the (melted) butter and sugars at medium speed until smooth, about 1 min. Add the vanilla, egg, and egg yolk and beat on medium to low speed until fully incorporated, about 30 seconds, scraping down the bowl and beater as needed with a rubber spatula. Add the dry ingredients (and chopped walnuts) and mix on low until combined, about 30 seconds. Mix in the chocolate chips until just incorporated.

    4. Divide the dough into 18 portions, each about half a cup, and roll them between your hands into balls. Holding one dough ball with your fingers, pull the dough apart into 2 equal halves. Rotate the halves 90 degrees and, with the jagged surfaces facing up, join the halves together at their base, again forming a single ball, being careful not to smooth the dough's uneven surface. Place the cookies on the baking sheets, spacing them about 2.5 inches apart.

    5. Bake until the cookies are light golden brown and the edges start to harden but the centers are puffy and still soft, 15-18 mins [every oven is different but it took me 18 mins], switching and rotating the baking sheets halfway through the baking time. Allow the cookies to cool.


    Video: America's Test Kitchen version of a Thick and Chewy Chocolate Chip Cookie

    Taste of Seattle

    I know this blog is mainly about food, but I'd also like to talk about something else that I enjoy very much which is traveling. I've always thought that you can experience a new city through food. A couple of weeks ago, I went to Seattle, WA for vacation. Why? Mainly because I've never been to Seattle, and the Pacific Northwest seemed close enough to me here in the California Bay Area that I made it into an extended weekend stay instead of a week long vacation and it was a very affordable vacation.

    The Space Needle in Seattle Center
    The Symbol of Seattle: the Very Iconic Space Needle
    I stayed for 3 full days, but you can cover the best parts of the city in 2 days: 1 day of walking around and 1 day with a car. On the day I had the car, I went to Hiram M. Chittenden Locks (pretty cool to see a ship go through a lock), visited Bruce Lee's grave, and The Museum of History and Industry. On the other 2 days when I was on foot I, of course, did the touristy thing and went to the Seattle Center where the Seattle's iconic Space Needle is located (there is a restaurant at the top or you can just go there to grab a drink in the bar), the EMP, and Chihuly Gardens. I also went to Pioneer Square and took the Underground Tour (I highly recommend!) and then Pike Place Market.
    Pike Place Market in Seattle, WA
    Seattle's Famous Pike Place Market
    This is the part where this post turns back to food. Pike Place Market is a public market with various stalls where you can go and experience all kinds of foods - jams, nuts, seafood, breads, smoked salmon, etc. It's very similar to The Ferry Building in San Francisco and Quincy Market in Boston (coming soon: my Taste of Boston post from last Spring). It's the market that you see on tv where fishmongers throw fish, but when I was there I unfortunately didn't see any fish flying anywhere. I think they only do that when there are tv cameras around.

    Pike Place Fish Co.
    Pike Place Fish Co. known for hurling fish
    I like how the various vendors at Pike Place Market sometimes give out samples to try also. I had a small cup of (blueberry flavored) Greek Yogurt which was quite good. Being in Seattle, I absolutely had to order some seafood since Seattle is known for having some fresh fish. I ordered a bowl of cioppino which I've never had before. The cioppino definitely hit the spot on that particular day since it rained and it was cold throughout the 3 days I was there. I guess it's true what they say about Seattle - that it's always raining. If you're in the mood for chowder, try Pike Place Chowder which is obviously at Pike's. They've won the best clam chowder award so many times, that they were told that they were indeed the best and to stop participating in these chowder competitions to allow others to have a chance at winning. A good recommendation for a good Seattle restaurant is Ray's Boathouse & Cafe which is a waterfront restaurant that serves the freshest Dungeness crab, oysters, and wild salmon from Alaska. This particular restaurant was recommended by a coworker of mine who happened to go to Seattle a week before me and it was mentioned in my Top 10 Seattle guidebook. Other restaurants in Seattle include Umi Sake House (sushi), Wild Ginger (Asian fusion), Ivar's on Waterfront for seafood, Kedai Makan (hole in the wall Malaysian take out - it's literally just a walk-up window) and Chihuly Center Cafe (bistro). You can't go wrong with any of these good options.

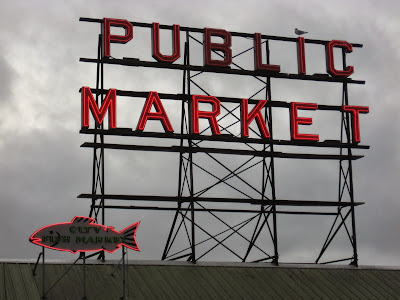
    Pike Place Market Sign
    Pike Place Market in Seattle
    Around the Pike's Market area, you may see a Sur La Table which is a kitchen store that I love going to here in the CA Bay Area. I didn't know this, but Sur La Table is based in Seattle. At Pike's Market, not only did I want to try some Seattle food, but I also wanted to buy food from Seattle to take back home. I was at DeLaurenti, a Mediterranean gourmet grocery store at Pike's Market, buying some local Focaccia Bread (Essential Baking Company based in Seattle), and if you've read my blog, you'd know that I'm a big fan of focaccia bread. This focaccia was quite good: it was soft and moist. The focaccia I make tends to have a crunchy exterior whereas this Seattle focaccia was soft and sponge-like. When I was purchasing this bread, I asked the cashier what he recommended I buy to take back home for the rest of my family. He recommended buying some smoked salmon which is typical Seattle. The smoked salmon comes sealed in a box, so it's easy to carry back inside your carry-on luggage. I had already planned to buy some smoked salmon since my family already requested it, but he also said I can bring back some chocolates. He then directed me to some chocolates that are made in Seattle (Theo Chocolate), so I bought a couple bars of 85% cocao dark chocolate. My family absolutely love the dark and bitter chocolates as opposed to milk chocolate.

    Pike Place Market closed during the Ghost Tour
    The Ghost Tour takes you through Pike Place Market after closing.
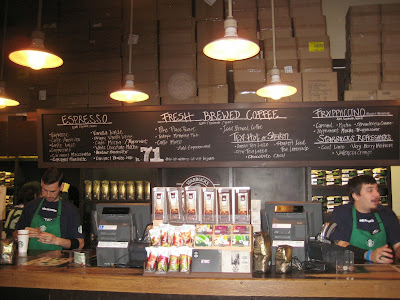
    Now that I've tried some Seattle seafood and bought some Seattle food to bring back home to my family, what else can I do to further experience Seattle? Well, other than food, do you know what else Seattle is known for? Coffee! Yes, there are cafes virtually everywhere, but I found it kind of strange that although there seemed to be 3 Starbucks within a 1 block radius anywhere you go in Seattle, I did not see one Seattle's Best Coffee. But going back to Starbucks, I made it a point to go to the very first Starbucks. I went there, and there was a line literally out the door so there was definitely a wait to get a cup of coffee.

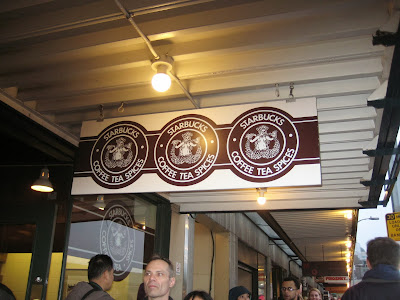
    The Very First Starbucks in Seattle
    The very first Starbucks in Seattle. Note the different logo of the mermaid.

    Inside of the original Starbucks
    The inside of the original Starbucks that started it all.
    I went with my "go to" coffee when going to Starbucks which was a white chocolate mocha. Even though I was there as a tourist just like everyone else, it's quite a shame that the very first Starbucks is more of a tourist spot than a place where you can go to get a coffee. I'm sure 99% of their customers are people from out of town and those from Seattle just go to the next closest Starbucks which is probably a block away and you probably don't have to wait very long. As a tourist, you kind of want to go where the locals go and hangout.

    receipt from the first Starbucks
    sign from the first Starbucks at Museum of History and Industry
    A souvenir from the first Starbucks.A sign from when the first Starbucks opened (Museum of History and Industry)
    I wasn't aware of this, but if you're into beer, Seattle is also known for its breweries. Seattle is home to common beers that you see at bars and restaurants like Pyramid and Redhook beer. In fact you can visit the Pyramid Brewery in Seattle which is located close to CenturyLink Field where the Seattle Seahawks play. There's also a beer there called Rainier beer which is to Seattle as Anchor Steam is to San Francisco and Sam Adams is to Boston. Rainier beer is a light beer which is equivalent to Pabst Blue Ribbon which could be a good thing or a bad thing. It's a bad thing if you don't like diluted, watered-down beers, but a good thing if you're yuppie and you find it hip to be drinking PBR which leads to the question: since when was drinking PBR ever that cool?

    Fans walking to CenturyLink Field to watch the Seahawks play the New Orleans Saints in the NFC Divisional Playoffs.
    Fans walking to CenturyLink Field to watch the Seahawks play the New Orleans Saints in the NFC Divisional Playoffs.
    Lastly, this is for those who have a sweet tooth for candy and in particular gum. In an alley below Pike's market, there is what is aptly called the Gum Wall. I had no idea what it was when I first heard of it, and for some reason it just didn't occur to me that it was just a wall of gum. People would discard their gum after chewing and stick it on this wall and hence the name Gum Wall.

    Seattle's Monorail built in 1962 for the World's Fair
    Seattle's Monorail built in 1962 for the World's Fair
    If you want to know more about Seattle or are planning a visit and you'd like to know more about the things to do, let me know. I felt like I saw a lot of Seattle and covered a lot of ground in my 3 days there. Seattle is a nice city to visit if you've never been. The one thing I would do differently is to not visit during the middle of winter. The reason why I went earlier this month was because it was my friend's spur of the moment idea to go, so he was the one to set the date. Ideally, you'd like to go when it's a bit warmer even though it wasn't that much colder than what we would normally get here in the San Francisco Bay Area. I did, however, experience the real Seattle in the form of constant rain. I would also recommend staying in downtown Seattle, so that you're walking distance from Pike's Market and close to the light rail to go to and from the airport (otherwise it's a $40 cab ride) or Monorail to go to Seattle Center.

    America's Test Kitchen: Buffalo Wings for your Super Bowl Party

    [Scroll down to view recipe and video]

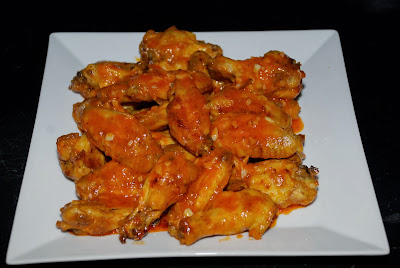
    Super Bowl XLVIII (that's the number 48) is a couple of weeks away and the Denver Broncos will be facing the Seattle Seahawks. There are already a few givens: the Super Bowl will be played in MetLife Stadium (home of the New York Jets and New York Giants of the NFL), Bruno Mars is performing the half time show, billions of dollars will be spent on 30 second commercials, and (even more importantly) millions of chicken wings will be consumed for this 3-4 hour event. Chicken wings are a common staple for this annual event and is in fact the ultimate party food whether it'd be in a bar or someone's house all across the nation. You're sure to enjoy these wings whether you're a Dallas Cowboys fan or you root for the New England Patriots.

    Buffalo Wings for your Super Bowl party
    Buffalo Wings is to the Super Bowl as Turkey is to Thanksgiving
    Typical Super Bowl snacks include tacos, nachos (Que Bueno nacho cheese from Costco is the best), pizza, pretzels, chips and salsa, but chicken wings are by far my favorite for this annual event. Common places where you can get some good chicken wings are Buffalo Wild Wings (ie Asian Zing, Caribbean Jerk, Mango Habanero), Wingstop (ie garlic parmesan, lemon pepper, atomic), or KFC (the sauceless hot wings are actually my favorite there over the honey barbecue!). My sister has a friend who owns a Wingstop and supposedly they ran out of chicken wings during last year's Super Bowl. Luckily for us, we don't have to rely on restaurant food to get some good buffalo wings for the big game. We can just plan ahead and make our own by going to the grocery store earlier in the week and preparing them on Sunday in time for the big game. The grocery store usually sells a pack of wings (drummettes and wingettes), so you can get yourself several packs and cook buffalo wings from scratch. Now I haven't tried these same wings as oven fried, but that might be something I may want to explore as a healthier alternative for any big game: NBA playoffs, Stanley Cup Final, FIFA World Cup Soccer, NCAA March Madness, Winter Olympics in Sochi, a Manny Pacquiao championship bout, World Series, World Series of Poker, or even the National Spelling Bee on ESPN 8 ("The Ocho")! You may even want to make these for National Chicken Wing Day which is in a few months.

    America's Test Kitchen's recipe for buffalo wings (in the episode Party Foods, Season 3, Episode 1) is the answer to making your own buffalo wings for your Super Bowl party. What I like about this recipe is that you can adjust the level of heat depending on the palates of you and your guests or you can even make 2 batches of wings - spicy and mild. Also, one thing I learned about this recipe which I didn't know before was the use of cornstarch to crisp the exterior of the wing. I've always wondered how KFC, Wingstop, and Buffalo Wild Wings did it, and now I know. In addition to great flavor, I like my wings to give a good crunch when you first bite into it. Texture is as important as flavor here. Speaking of flavor, in general I do like Frank's RedHot hot sauce which is the common sauce for buffalo wings. If you don't have Frank's or your store is all out of stock, you can always use Crystal hot sauce which is just as good in my opinion. Both have very similar flavors that I'm beginning to think that they're the same sauce put in 2 different bottles.

    Now, let's be realistic, buffalo wings aren't exactly the healthiest food you can eat and I never really understood why carrot and celery sticks were always paired with buffalo wings. Is it just for decoration? I don't know. This is a Super Bowl party. We're eating wings, pizza, fries, nachos, and anything that is remotely unhealthy, so there's no room in my stomach for veggies unless it's guacamole, salsa, or onion rings. If you need vegetables to help you feel less guilty, then by all means include them. I always discard the celery and carrot sticks whenever I order buffalo wings at a restaurant anyway, so I don't even bother serving them whenever I make these wings for my guests. I do, however, make the blue cheese dressing though. I find that the dairy goes well with the spiciness of the buffalo wings when you use it as a dipping sauce for your wings - the dressing really does complement the wings. I've used the dressing as a condiment for chicken nuggets, fries, and even as a spread for a burger or sandwich. The recipe for that is below as well. If you don't feel like making the blue cheese dipping sauce, I sometimes use ranch dressing. You can just use a bottle of your favorite store bought ranch dressing as a dipping sauce instead of the blue cheese. I know some people don't like blue cheese because of its pungent flavor, but I'm one of the few that enjoy the taste of blue cheese. Or better yet if you don't like blue cheese, you can make these buffalo wings and give your guests a variety of other dipping sauces to choose from: ranch, ketchup, honey mustard, creamy parmesan, chili lime, teriyaki, curry, Cajun, and even an Asian peanut sauce just to name a few.

    FlavorFool's Notes

  • I don't bother serving the buffalo wings with celery and carrots. I do, however, like making the blue cheese dressing as a dipping sauce for the wings or use any store bought ranch dressing instead.
  • If you don't have Frank's RedHot Hot Sauce, you can always use Crystal Hot Sauce which tastes the same to me.
  • Adjust the amount of heat by the amount of Tobasco you use in the buffalo wing sauce. I like my wings on the milder side (unlike Wingstop's Atomic chicken wings) but with a little bit of heat enough to make your nose run a little but not to the point where your chugging a glass of water for every wing eaten.
  • Feel free to use the blue cheese dressing for other food like French fries, chicken nuggets, or as a spread for your sandwich or hamburger.
  • Have plenty of paper towels for your guests because these buffalo wings are finger-licking good! This is definitely a worthwhile Super Bowl recipe for your gameday party.
  • Super Bowl Buffalo Wings Recipe

    America's Test Kitchen - season 3, episode 1, Party Foods
    Serves 6 to 8

    Frank's RedHot Original Sauce is not super spicy. We like to combine it with a hotter sauce, such as Tobasco, to bring up the heat.

    Ingredients

    Sauce
    2 tbsp Tabasco sauce or other hot sauce, plus more to taste
    1/2 cup hot sauce, preferably Frank's Louisiana Hot Sauce [Crystal Hot Sauce is just as good]
    2 tsp cider vinegar
    1 tbsp dark brown sugar
    4 tbsps unsalted butter

    Wings
    3 lbs chicken wings (about 18 wings)
    3 tbsp cornstarch
    1 tsp table salt
    1 tsp ground black pepper
    1 tsp cayenne pepper
    1 - 2 quarts peanut oil (or vegetable oil) for frying

    Creamy Blue Cheese Dressing and Vegetables [I left out the veggies]
    2 1/2 oz blue cheese, crumbled (about 1/2 cup)
    3 tbsp sour cream
    3 tbsp buttermilk
    2 tsp white wine vinegar
    2 tbsp mayonnaise
    2 medium carrots, peeled and cut into thin slices
    4 stalks celery, cut into thin sticks

    Instructions

    1. For the Sauce: Melt butter in small saucepan over low heat. Whisk in vineger, brown sugars, and hot sauces until combined. Remove from heat and set aside.

    2. For the Wings: Preheat oven to 200 degrees. Line baking sheet with paper towels. Heat 2 1/2 inches of oil in large Dutch oven [dutch oven is good because it holds heat really well] over medium-high heat to 360 degrees. While oil heats, mix together salt, black pepper, cayenne, salt, and cornstarch in small bowl. Dry chicken with paper towels and place pieces in large mixing bowl. Sprinkle spice mixture over wings and toss with rubber spatula until evenly coated. Fry half of chicken wings until golden and crisp, 10 to 15 mins. With slotted spoon, transfer fried chicken wings to baking sheet. Keep first batch of chicken warm in oven while frying remaining wings.

    3. For the Creamy Blue Cheese Dressing and Vegetables: Mash blue cheese and buttermilk in small bowl with fork until mixture resembles cottage cheese with small curds. Stir in cider vinegar, mayo, and sour cream. Taste and adjust seasoning with pepper and salt. Can be covered and refrigerated up to 4 days.

    4. To Serve: Pour sauce mixture into large bowl, add chicken wings, and toss until wings are evenly coated. Serve immediately with the celery and carrot sticks [I didn't bother including the vegetables] and blue cheese dressing on side.

    5. To Make Ahead: The fried, unsauced wings can be kept warm in the oven for up to 1 1/2 hrs. Toss them with the sauce just before serving.


    Video: America's Test Kitchen Buffalo Wings for your Super Bowl party

    America's Test Kitchen: Beef Empanadas

    [Scroll down to view recipe and video]

    I like empanadas. Empanadas are a common food in many Latin countries and are commonly eaten as appetizers or tapas (snacks). They are like a pocket of food consisting of a flaky and buttery pastry exterior with a savory filling in the inside. You can

    make vegetarian empanadas, chicken empanadas, beef empanadas, and it can either be fried or baked in the oven as well. The combinations are endless depending on the type of filling you want residing in the empanada. In the episode Tostadas and Empanadas (Season 11, Episode 3), ATK chef Bridget Lancaster shows Chris Kimball how to make a Chilean empanada with a beef filling inside.

    America's Test Kitchen Beef Empanada
    America's Test Kitchen Beef Empanadas out of the oven
    The use of tequila to make the empanada dough gave me an initial sense of hesitation when trying this recipe. In general I don't drink alcohol all that often, so anytime a recipe calls for alcohol whether it's a beer for a batter, wine for a sauce, or brandy in a dessert, I'm somewhat hesitant. I just don't like the alcohol taste in my food even though I know most of it will burn off in the cooking process. My initial fears though were put to rest because I didn't taste any trace of tequila in the empanada dough. Thankfully, the dough was easy to put together with the use of my trusty food processor.

    Also, in regards to the dough, you can easily find the masa harina at your local grocery store. I've never heard of it prior to making this recipe, so I thought I had to go to some specialty store to buy some until I found it in the baking aisle next to all the other flours at my local store. You may also be able to find it in the international aisle of your local grocery store. I think it's common enough that you can find it mostly anywhere and you don't have to go out of your way looking for it.

    I didn't change much from the original recipe. I made the dough exactly as specified in the recipe and the filling was quite good too. I really liked adding the chopped eggs and especially the cilantro to the filling. If you've read my post on ATK's chicken tikka masala, then you know that I love cilantro. I know many of you don't care for cilantro, but I find the cilantro really complements the filling that goes well in Latin flavors. The only thing I changed was that I left out the olives only because in general I don't like olives. Olives have a distinct flavor that I just isn't my cup of tea. I also left out the raisins. I actually like raisins. I put raisins in my oatmeal, cereal, yogurt, and I like Raisinettes (chocolate covered raisins). Raisins cooked in a savory dish, however, are a different story. I find that cooked raisins get a strong and overwhelmingly sweet flavor that takes over the flavor profile of whatever it is that they are in. If I leave the raisins and bite into these empanadas, all I taste are raisins which is what I absolutely don't want.

    What also makes this recipe easy is the fact that you don't have to deep fry it. Don't get me wrong...frying it in oil definitely makes it taste good, but baking it in the oven is healthier. Furthermore, frying it does take more work and it can get messy as well. Popping it in the oven does make it easier though and less greasy. When I decide to make these empanadas either as an appetizer or tapas, I like to make smaller empanadas. Instead of making a dozen empanadas, sometimes I'll just make 18 smaller ones.

    Beef Empanadas crimped with roped edges
    Beef Empanadas crimped with roped edges.
    Ok now this is just extra credit. The way I sealed the empanada was that I used a fork to crimp the edges which is what they do in the episode and is a common technique that is easy and simple to do. I've seen in some places (like Argentina), the way you seal the edges is almost like an art. You can even fold the edges on itself over and over again such that the edge looks like that of a rope (pictured below). You can try it out and make your empanadas a little more fancy looking. You can even fold your empanadas into triangles if that is a little easier for you instead of half moons. There's just a whole bunch of different possibilities that you can play around with when shaping your empanada.

    Beef Empanadas Recipe

    America's Test Kitchen - season 11, episode 3, Tostadas and Empanadas
    makes 12 empanadas

    Ingredients

    FILLING
    1 lb 85% lean ground chuck
    2 tbsp plus ½ cup low-sodium chicken broth
    1 large slice white sandwich bread, torn into quarters
    Ground black pepper & table salt
    1 tbsp olive oil
    4 medium garlic cloves, minced or pressed through garlic press (about 4 tsp)
    2 medium onions, chopped fine (about 2 cups)
    ¼ tsp cayenne
    1 tsp ground cumin
    ⅛ tsp ground cloves
    2 hard-cooked eggs, coarsely chopped
    ½ cup packed cilantro leaves, coarsely chopped
    ¼ cup pitted green olives, coarsely chopped [I left this out]
    ⅓ cup raisins, coarsely chopped [I left this out]
    4 tsp cider vinegar

    DOUGH
    1 cup (5 oz) masa harina
    3 cups (15 oz) unbleached all-purpose flour, plus extra for dusting work surface
    2 tsp table salt
    1 tbsp sugar
    12 tbsp (1½ sticks) unsalted butter, cut into ½-in cubes and chilled
    ½ cup cold water
    ½ cup cold vodka or tequila
    5 tbsp olive oil (for baking empanadas)

    Instructions

    1. FOR THE FILLING: Process bread and 2 tbsp chicken broth in food processor until paste forms, about 5 seconds, scraping down sides of bowl as necessary. Add beef, ½ tsp pepper, and ¾ tsp salt and pulse until mixture is well combined, six to eight 1-second pulses.

    2. Heat oil in 12-inch nonstick skillet over medium-high heat until shimmering. Add onions and cook, stirring frequently, until beginning to brown, about 5 min. Stir in cloves, garlic, cayenne, cumin; cook until fragrant, about 1 min. Add beef mixture and cook, breaking meat into 1-inch pieces with wooden spoon, until browned, about 7 min. Add remaining ½ cup chicken broth and simmer until mixture is moist but not wet, 3 to 5 min. Transfer mixture to bowl and cool 10 min. Stir in eggs, vineger, olives, raisins, and cilantro [I left out the raisins and olives]. Season with pepper and salt to taste and refrigerate until cool, about 1 hr. (Filling can be refrigerated for up to 2 days.)

    3. FOR THE DOUGH: Process masa harina, 1 cup flour, salt, and sugar in food processor until combined, about two 1-second pulses. Add butter and process until homogeneous and dough resembles wet sand, about 10 seconds. Add remaining 2 cups flour and pulse until mixture is evenly distributed around bowl, 4 to 6 quick pulses. Empty mixture into large bowl.

    4. Sprinkle tequila or vodka and water over mixture. Using hands, mix dough until it forms tacky mass that sticks together. Divide dough in half, then divide each half into 6 equal pieces. Transfer dough pieces to plate, cover with plastic wrap, and refrigerate until firm, about 45 minutes or up to 2 days.

    5. TO ASSEMBLE: Adjust oven racks to upper- and lower-middle positions, place 1 baking sheet on each rack, and heat oven to 425 degrees. While baking sheets are preheating, remove dough from refrigerator. Roll each dough piece out on lightly floured work surface into 6-in circle about ⅛ inch thick, covering each dough round with plastic wrap while rolling remaining dough. Place about 1/3 cup filling in center of each dough round. Brush edges of dough with water and fold dough over filling. Trim any ragged edges. Press edges to seal. Crimp edges of empanadas using fork.

    6. TO BAKE: Drizzle 2 tbsp oil over surface of each hot baking sheet, then return to oven for 2 minutes. Brush empanadas with remaining tbsp oil. Carefully place 6 empanadas on each baking sheet and cook until well browned and crisp, 25 to 30 min, rotating baking sheets front to back and top to bottom halfway through baking. Cool empanadas on wire rack 10 min and serve.


    Video: watch how to make the recipe for Beef Empanadas

    Thanksgiving Turkey and Ham Leftovers

    Once the big day has passed and everyone has their fill of Thanksgiving turkey, gravy, pumpkin pie a la mode, ham, yams, stuffing, cranberry sauce, and football, we're all left with a food colma, stuffed belly, tryptophan, and a surplus of leftover food. This is a common occurrence for many families around the country the day after Thanksgiving, and one may ask what are we to do with all these leftovers?

    HoneyBaked ham for Thanksgiving
    A typical HoneyBaked ham for Thanksgiving

    Most of the time I just reheat whatever was left over and have myself a meal with that. There is one thing, however, that I do that is beyond just reheating it in the microwave the next day and it's nothing complicated - quite simple actually. In my family we usually have a turkey weighing in at twenty pounds and a HoneyBaked ham at six pounds as our primary proteins for Thanksgiving, so having Thanksgiving day leftovers is a given for us whether you deep fried a turkey or popped it in the oven. On the day of Thanksgiving, I of course have my share of turkey, but I actually don't touch the ham at all.

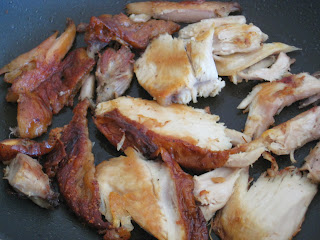
    cooking leftover Thanksgiving ham and turkey
    Pan frying leftover Thanksgiving ham (left) and turkey (right).

    I just don't like the taste of the ham as is, but once Thanksgiving is over, the tryptophan has worn off, and Black Friday rolls around, it's a totally different story. What I like to do the day after Thanksgiving is to put the leftover turkey and especially the leftover ham into a pan or skillet and fry it up. I'm not talking about deep frying it, but just a simple pan fry. The ham itself doesn't need any extra oil since there's enough oil already in it. The turkey, on the other hand, may benefit from a little bit of oil or cooking spray like Pam. Frying up the leftover turkey and ham doesn't take a whole lot of time either. Pan frying the turkey and ham gives it a nice crispy texture and frying up the ham in particular even gives it an added flavor.

    pan frying leftover ham and turkey
    Fried ham (left) and turkey (right)

    The ham is originally given a honey glaze so when you fry it, the sugars from the honey carmelize and you get the distinct flavor and crispiness on the edges of the ham that you wouldn't get on the turkey. If you plan on frying both the turkey and ham in the same pan, definitely do the leftover turkey first and then the ham. The sugars on the ham will stick to the pan and once on the pan it'll burn. That's fine when frying the ham, but once the ham is done, you still have the turkey to fry up. That is why I highly recommend doing the turkey first and ham last, so the sugars don't get too burned and smokey on the pan when frying the turkey last.

    With the fried up slices of turkey and ham, I sometimes have it with some rice and scrambled eggs if I'm in the mood for a breakfast type meal or in between two slices of toasted bread for a sandwich. The leftover gravy as a spread in the turkey sandwich really makes the sandwich moist and prevents it from being too dry. You just need to put a little big of gravy because using too much will make your bread soggy and break apart when handling it. For the ham, I would put some cheese in it for a typical ham and cheese sandwich. I like using Swiss cheese in my sandwich.

    One other thing that I do with the leftover turkey (but not the ham) is to use it in turkey pot pie instead of a chicken pot pie. This works well for both the white and dark meat. I typically use the recipe from America's Test Kitchen for chicken pot pie to make my turkey pot pie. Another idea is to make empanadas with leftover turkey, stuffing, and gravy filling or perhaps making turkey and dumplings instead of chicken and dumplings.

    Carmelized slices of leftover ham
    Carmelized slices of leftover ham the day after Thanksgiving.

    Thanksgiving Mashed Sweet Potatoes or Yams Casserole

    [skip to see: recipe]

    Thanksgiving is only a few days away and in addition to the Thursday feast with the traditional turkey (or deep fried turkey) that most people will be partaking in this week, we often have potlucks at work as a pre-Thanksgiving ritual to bring out the festivities at the work place. As with most office potlucks, we seem to see a surplus of salads (fruit salad, green salad, pasta salad, potato salad) and desserts (cakes, pies). Why? Because salads are easy to make and desserts are easy to pick up. Now I wanted to bring a decent side dish that people would enjoy and would let everyone know that it's Thanksgiving, so I turn to a common Thanksgiving staple: sweet potatoes.

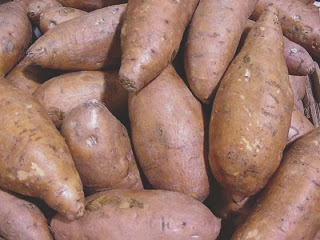
    Sweet potatoes for Thanksgiving
    Sweet Potatoes

    yams for Thanksgiving
    Yams

    Most Thanksgiving meals are characterized with the turkey (of course) and other common Thanksgiving items such as stuffing, gravy, ham, cranberry sauce, and pumpkin pie a la mode. Out of all the Thanksgiving dishes that we have, I always go to the dish that one of my sisters always brings to the party: sweet potato casserole or what I refer to as mashed sweet potatoes. This by far is my favorite Thanksgiving dish and I always look forward to it, and my sister gave me the recipe so that I can make it for my office potluck. It's sweet flavor profile makes me think that I'm eating dessert with my turkey. It definitely is a stark contrast from the savory flavor of regular mashed potatoes.

    The first question which you may ask in regards to this dish is: What's the difference between sweet potatoes and yams? Now I'm not really sure and for you readers who may know, correct me if I'm wrong. As far as I know and for all intents and purposes, yams are bright orange whereas sweet potatoes are ligher and almost white in color. I know I know...both terms are often used interchangeably (for example sweet potato fries which tend to use the orange variety). For this recipe, you could use either the white (sweet potatoes) or orange (yams), but I prefer to use the white variety because it's a bit healthier than the orange. Luckily, my local grocery store only carries 3 kinds: the white, orange, and purple. Whatever you use, do not use the purple one.

    Difference between sweet potatoes and yams
    Sweet potato with its white inside (left) and yams with its orange inside (right).

    The pecan topping gives this dish a slight crunch in contrast to the smooth texture of the mashed sweet potatoes and the sugar added to the potatoes obviously sweetens this dish. My favorite ingredient though is the vanilla. For some reason it's the vanilla that makes this dish great. I've had other mashed sweet potatoes and they've all been just ok...nothing great, but the vanilla gives this dish a certain depth of flavor that complements the sweet potatoes, pecans, and sugar.

    Sweet Potato casserole without the pecan topping
    Sweet Potato casserole before adding the pecan topping.

    This recipe is enough to fill an 8x8 or 9x9 inch square 2 quart casserole dish. 3 cups of mashed sweet potatoes doesn't seem like a whole lot, but it definitely can fill an 8x8 pyrex dish 1 inch deep. This is what I'm going to use for my work potlocuk since there'll be other dishes people will be bringing and a square casserole dish can fit in the microwave for reheating. For bigger family events, I double the recipe and use a rectangular casserole dish.

    The original recipe was very basic, and I had to do a lot of improvising so continue reading:

    FlavorFool's Notes

  • Buying 2 medium to large sweet pototoes will equate to roughly 3 cups of mashed sweet potatoes.
  • I used brown sugar instead of white sugar in the mashed sweet potatoes because white sugar made it too sweet. If it's still too sweet for your palate, cut the sugar to 1/2 cup. The sweet potatoes already have a certain sweetness to them so you don't want to over sweeten them.
  • For the topping, the only thing I used was the pecans. I left out the sugar, butter, and flour because I didn't want to make it more complicated than it had to be and I wanted the sweet potatoes to be the hero of the dish and not the topping. In this case simpler is better.
  • You can take the time to chop the pecans or you can do what I did which was put the pecans in a sandwich bag and hammer it with a meat tenderizer. There might be a few pecan pieces that are still too big so you may need to take care of those individually. You can use a food processor to chop up the pecans, but I absolutely hate cleaning the food processor.
  • Pecan Topping on Mashed Sweet Potato Casserole
    Pecan Topping on Mashed Sweet Potato Casserole

    layers of sweet potato casserole
    Cutting into the mashed sweet potatoes reveals the 2 layers.

    Mashed Sweet Potatoes or Yams Recipe

    makes 1 8x8 casserole dish

    Ingredients

    3 cups [mashed] yams or sweet potatoes [about 2 medium to large sweet potatoes]
    2/3 cups sugar [I used brown sugar instead of white sugar and use only 1/2 cup if still too sweet]
    1 egg
    1/3 cup butter
    1 tsp vanilla [I increased vanilla to 1.5 tsp for more flavor]
    1/3 cup milk [I used 2% milk because that is what I had]

    Topping
    1 cup finely chopped pecans [1 cup did seem too much so you can get away with only using 3/4 cup]
    1/3-cup all-purpose flour [I left this out]
    1/3-cup butter softened [I left this out]
    ¾ cup packed brown sugar [I left this out]

    Directions

    1. Preheat oven for 350°. Peel yams and cut each into 8 equally sized pieces and boil yams and drain well. You will know when they are done when the sweet potato pieces are soft and you can easily stick a knife or fork in them with little effort.

    2. Combine yams or sweet potatoes, sugar, eggs, milk, vanilla and butter. Beat with electric mixer until smooth. [I mashed up the sweet potatoes before adding them to the mixer and allowed the mixer to integrate the rest of the ingredients]. Spoon into a 2-quart casserole.

    3. Topping: Combine brown sugar, flour, butter and pecans; sprinkle over top of casserole. [I only added the chopped pecans and left out the rest of the ingredients for the topping]

    4. Bake for 30 minutes. Serve warm.

    Quick Cooking Tip: Frying a Turkey for Thanksgiving

    Thanksgiving - the Super Bowl of all meals which makes it my favorite holiday. Thanksgiving is mainly an American holiday where it's tradition to watch football (most likely the Dallas Cowboys or Detroit Lions) and eat such dishes like mashed potatoes, gravy, cranberry sauce, yams, pumpkin pie, and of course the turkey. Many Americans have also adopted a new tradition for Thanksgiving - fried turkey. Because deep frying a turkey has quickly become a common practice in many American households, I thought I'd offer a few valuable tips from my experience in frying turkeys which might prove useful for anyone interested in a deep fried turkey for Thanksgiving.

    Deep frying a turkey for Thanksgiving
    Deep frying a turkey for Thanksgiving

    • Frying a turkey is not like frying chicken. You don't have to dredge it in flour, egg, or breadcrumbs. What you would normally do is brine it in some water/salt solution at least overnight up to a few days. This will prevent the white meat from the breast from drying out.
    • I like using a turkey weighing somewhere between 12 to 14 pounds. I prefer a smaller turkey because I still like preparing a traditional turkey in the oven (for those traditionalists) giving my family and guests the option of both turkeys instead of 1 large 20+ lb turkey.
    • I fry the turkey for two and a half minutes per pound. 3 minutes per pound seemed to overcook the turkey and dry out the white meat while 2 minutes undercooked, so two and a half minutes worked well for me.
    • There are various oils you can use to fry the turkey like corn or canola oil. I prefer to use peanut oil. Although peanut oil tends to be a bit more expensive than most other oils, it seems to last longer before going rancid, but more importantly, it has a high smoke point unlike, say, olive oil. For your information, peanut oil is commonly used in Chinese cooking. If no one in your family has any peanut allergies, then go with peanut oil.
    • For extra safety, wear long sleeves, pants, and shoes to minimize getting burns from the hot oil. You could even use goggles as well if you're not completely comfortable. Always be safe and take the proper precautions. It's always best to be safe than sorry.
    • I normally heat the oil to 365 degrees before dropping in the turkey. Just prior to lowering the turkey into the fryer, I like to pat dry the turkey with paper towels (after the turkey has already been removed from the brine, rinsed (so that it isn't too salty), and allowed to dry a bit of course) to minimize the amount of water going into the hot oil. In case you didn't know, water and hot oil do not mix and can cause small explosions. The water will turn into steam. The hot oil is hotter than steam and the steam expands violently causing these explosions.
    • Lastly and most importantly, here's the one tip that I hope everyone follows. This tip is worth it's weight in gold. This tip can be explained with the help with the diagram below. It has to do with the amount of cooking oil you use. Do this step before you brine the turkey. You get your empty turkey fryer (step 1). Then, you put your turkey in it (step 2). You fill it up with water so that the water just covers the turkey entirely (step 3). You take your turkey out and before dumping the water, note the water level (denoted with the red arrow) once the turkey has been removed (step 4). The water level at this point is where you will later fill up your pot with oil.

      Amount of Oil Frying Turkey
      Figuring our the appropriate amount of oil to use for deep frying a turkey for Thanksgiving.

      Why is this step so important? It's important because you don't want to put too much oil in your fryer. You only do you want to use just enough oil. You often hear in the news about people burning down their house because they wanted to fry a turkey for Thanksgiving. What sometimes happens is that they use too much oil such that when they lower the turkey into the hot oil, the oil overflows out of the fryer pot and down to the open flame of the burner causing a grease fire. At that point a burnt turkey is the least of your problems.

    Grease Fire from Deep Frying a Turkey
    Using too much oil - don't let this happen to you.

    I hope you find these tips helpful and I hope everyone has a safe and wonderful Thanksgiving! Happy Thanksgiving!